Tuesday, December 10, 2024

Beet Power Bowl

I've been on a bowl kick recently.  Power salad bowls, since no one can decide what to call them.   This was lifted from a restaurant called Chicken & Pickle in St. Charles MO.

1 cup steamed beets

1/2 cup quinoa

One cup chopped greens/lettuce

2 Tbsp dried cranberries

2 Tbsp Slivered almonds

2 Tbsp Feta

2 Tbsp Lemon Vinaigrette (I use the Paul Newman Brand)


Basically mix and eat.  The beets can be cold from the fridge or warm from the steamer.  Steam the beets before you peel them and wear gloves the whole time to keep your fingers from being red for days!!!  Dietitian says it's better as a side dish for some protein.   


Thursday, January 28, 2021

Homemade Banana Pudding


I will admit that I don't remember a lot of banana pudding in my life growing up.  If we had it, it was probably banana pudding mix out of a box.  So this recipe which takes a little more time but is from scratch and fool proof is a joy.  (I do love telling people "Oh this? I made it from scratch!) 😀

This is wonderful and good warm and cold.  

For a Double Boiler, I simply fill a pan with water and set another pan in it. So long as the pan without the water sits above the pan with the water, it's                                             all good.

If you are concerned that there are three layers and that the layers be equal, put your cookies in 3 piles, your bananas, once sliced, in three even bowls and when the custard is done, put it in a large, glass measuring cup and once you've put a small amount on the bottom of your pan, you can see how much custard you have and divide it by 3.    

Ingredients:

3/4 cup sugar separated

1/3 cup all purpose flour

1 dash salt

3 eggs, separated

2 cups milk (I use 1 cup skim and 1 cup half and half, but I think any kind or combination will work)

1/2 tsp. vanilla extract

45 Vanilla Wafers

5 ripe bananas (about 3 1/2 cups divided)

Additional vanilla wafers and bananas for garnish

Preheat oven to 350 degrees.  

1) Peel and slice bananas and count out cookies before you start the pudding because it needs to be stirred constantly.

2) Mix 1/2 cup sugar, four and salt in the top of a double boiler.  Blend in 3 egg yolks and milk.  Cook, uncovered, over boiling water, stirring constantly, for 10-12 minutes or until thickened.  Remove from heat; stir in vanilla.

3) Reserve 10 wafers for garnish.  Spread small amount of custard on bottom of 1 1/2 quart casserole dish; cover with a layer of wafers and a layer of sliced bananas.  Pour about 1/3 custard over bananas.  Continue to layer wafers, bananas and custard to make 3 layers total, ending with custard.    

4) I place the pudding in the preheated oven for 10-15 minutes to make sure the pudding doesn't boil. Then remove.

5) Beat egg whites until soft peaks form; gradually add remaining 1/4 cup sugar and beat until stiff but not dry.  Spoon on top of pudding, spreading evenly over entire surface and sealing well to edges.

4) Bake at 350 degrees for 15-20 minutes or until browned.  Cool slightly.  Garnish with additional wafers and bananas and serve warm and refrigerate after cooling and serve cold with additional wafers and bananas.

**Adapted from the Banana Pudding Recipe on the back of the 'Nilla Wafers Box.


Homemade Chunky Applesauce


The great thing about recipes is you can play around with them a lot.  I found, as I got older, that my taste buds were changing and that my baked apples were suddenly something that tasted SO spicy to me that I couldn't eat them anymore.  So I took an applesauce recipe from the McCormick's website and played with it a little and found a wonderful way to eat cooked apples that I could enjoy!  And it's VERY easy!


Ingredients:

3 pounds of apples (I use a pound each of Granny Smith, Gala and Honeycrisp) peeled, cored and sliced 

1 cup apple cider

1/4 cup firmly packed brown sugar

1 Tbsp. Lemon Juice

1/2 tsp. ground cinnamon

Place all ingredients in a large pan.  Cook on medium high heat 20-25 minutes or until apples are tender, stirring occasionally.

As far as I'm concerned these apples are done.  We use them in oatmeal, muffins, eat it straight out of a bowl.  But if you want it to be a little less chunky then spoon apples into food processor or blender container.  Puree until desired consistency and pour into medium bowl, cover and refridgerate.   

These are great warm or cold and if you plan to use them in other things and eat straight, just double the recipe and use a bigger pot.  It will look like a lot of apples when you start, but they cook way down.


Friday, January 24, 2020

My First Husband's Perfect Grilled Cheese

When I was growing up, we would spread a bunch of butter on bread, with a knife, put the cheese between the slices and while cooking, smash the hell out of it with a spatula.  I always thought it was fine, until my boyfriend (later to become my first husband) looked at it and pronounced it disgusting.  And compared to what he taught me about grilled cheese, he was correct! 

It doesn’t matter what kind of bread or cheese you use, and maybe margarine would work.  What matters is that the instructions are followed to the letter!   My 2nd husband is eternally grateful to my 1st for teaching me to make an incredible grilled cheese!


Ingredients:
Sliced Bread (Chef’s choice of flavor)
Thinly Sliced Cheese (Chef’s choice of flavor)
Melted Butter (Start with a couple Tbsp and increase if needed)

Using a pastry brush, brush butter lightly on 1 entire side of bread.  Place bread in a cold skillet and turn the stove on medium.  Place cheese on bread and place 2nd slice of bread on top of the cheese.  Brush butter lightly on the 2nd slice of bread.
At some point, flip over the sandwich.  You can pick up it and peek under and see if it is browning and flip it. If it’s not browning you can return it and let it cook a little longer if desired, before flipping.
When you flip the sandwich, lightly brush more butter on the bread that is facing up, while the other side cooks.  You can continue to do this until the sandwich reaches the level of brownness you wish and you can see the cheese has melted. 
MOST IMPORTANT TIP:
NEVER EVER EVER touch the sandwich except to flip it and brush butter on it.  At no time should the spatula be used to press or crush the bread.  Flip and brush.  That is it!

This sandwich will melt in your mouth and you will never want to make it any other way.

**Courtesy of My First Husband (Although he doesn’t know!) 😊


Friday, January 17, 2020

Cream of Mushroom Soup

If you love to cook and you love cream of mushroom soup, this is for you!  I will post the website I got it from at the bottom, where they go into a lot of the whys of the ingredients, as well as substitutions.  I found it delicious this way.  And I made it with Better than Bouillon Vegetable Base.

Ingredients:
4 Tbsp. Butter
1 Tbsp. Oil (I used Olive Oil)
2 onions, diced
4 cloves garlic minced (4-5 tsp. garlic from a jar)
1 1/2 pounds (750 grams) mushrooms (I use a combination of white and portabella, but may try some different in the future)
4 tsp. fresh thyme, divided
1/2 cup Marsala wine (I used the wine that is sold as cooking wine)
6 Tbsp. all purpose flour
4 cups vegetable broth (made from Better than Bouillon Vegetable Base)
1-2 tsp. salt, adjust to taste
1/2-1 tsp. black cracked pepper
2 tsp. Better than Bouillon Vegetable Base (not prepared)
1 cup (1/2 pint) heavy cream (I set it out while I prepare the soup, so it won't be cold when its added)
Chopped fresh parsley/thyme to serve (optional)

Heat butter and oil in a large pot over medium high heat until melted.  Saute onions for 2-3 minutes until softened. Add garlic and cook until fragrant, about 1 minute.

Add mushrooms and 2 tsp. thyme and cook for 5 minutes.  Add win and cook for 3 minutes.

Sprinkle mushrooms with flour, mix well and cook for 2 minutes.

Add vegetable broth, mix well again and bring to boil.  Reduce heat to low-medium heat and season with salt and pepper.  Add 2 tsp. vegetable base and stir.

Cover and allow to simmer for 10-15 minutes, while occasionally stirring, until thickened.

Reduce heat to low, stir in cream.  Allow to gently simmer (do not boil).  Adjust salt and pepper to your taste. 

Mix in parsley and remaining thyme if desired.  Serve warm.

**Courtesy of https://cafedelites.com/creamy-mushroom-soup/


Super Easy Fudge

I want to say I got this from a coworker many, many years ago. I have pictures of my daughter and her friends making this when they were little and they aren't little anymore!  
This is insanely easy and very delicious, so it's perfect to take last minute as a gift or to a pot luck you've forgotten.
Ingredients
1 16 oz box or 3 1/2 cups powdered sugar
1/2 cup Cocoa Powder
1 stick butter
1/4 cup milk
1 Tbsp. Vanilla


1) Whisk powdered sugar and cocoa in a microwave safe mixing bowl.

2) Slice butter and place over the sugar/cocoa mixture

3) Pour milk over the butter

4) Microwave 45 seconds, remove and stir.  

5) Microwave another 45 seconds.  Remove, add vanilla and stir vigorously until fudge is smooth 

6) Line square pan with waxed paper and pour fudge in.

7) Refrigerate 1/2 an hour or more.  Cut into squares.  Can be served cold or left to reach room temperature before serving.  

Notes:
-If you want to try this with nuts, you're on your own.  No idea if it will be the same or not.  I just know I won't like it!  :)

-Tried it with 1/2 cup dark cocoa powder and my daughter (a dark chocolate freak) said it was great.

-This can be refrigerated in one of those plastic, holiday containers or any plastic, left over bowl with a lid, after its been cut into squares.

-Some people like it when its room temperature and slightly softer, some like it a little harder and cold.  All a matter of preference.

**Courtesy of some random coworker from the 1st Bush Administration I think.


Alison's Strawberry Bread

One of my best friends has been making this for all the years (26!!) I've known her.  I had really sort of forgotten about it, but once I got the recipe and made it, my family has demanded it constantly.  As Alison says, finding the pre-sliced, sweetened strawberries can sometimes be difficult.  This year, I used the whole, frozen , unsweetened strawberries.  I let them thaw out and crushed them and it was great.  No extra sugar needed.  It's a very thick batter, but if it feels too thick,a little more liquid can be used.
-Alison always puts nuts in hers.  I never put nuts in mine. :)
-This recipe makes 2 regular loaves or 6 mini loaves.    (Bake 40-45 minutes for mini loaves)
-Can be frozen once it is completely cooled.  I used plastic wrap followed by aluminum foil. Let thaw before serving.


Ingredients
3 cups all purpose flour
2 cups granulated sugar
1 tsp. baking soda
1 1/2 tsp. ground cinnamon
2 10-oz packages frozen, sliced strawberries, thawed (or 20 oz frozen, unsweetened strawberries, thawed, sliced or mashed)
1 1/3 cup vegetable oil
1 - 1 1/4 cup chopped pecans, more or less if desired (optional)
4 eggs, beaten well
Confectioner sugar (optional)

Sift flour, sugar, baking soda and cinnamon into a large bowl.  Make a well in the center of the flour mixture.
In another bowl, beat eggs and add thawed strawberries with juice, oil and pecans if desired.  Mix well.
Pour strawberry mixture into the well in the flour mixture and mix together slowly, but thoroughly.
Pour batter into two well greased and floured loaf pans.
Bake at 350 degrees 1 hour or until bread springs back when touched in the center.
Sprinkle confectioners sugar on top of slightly cooled bread if desired.

**Courtesy of Alison Secoy Weatherby


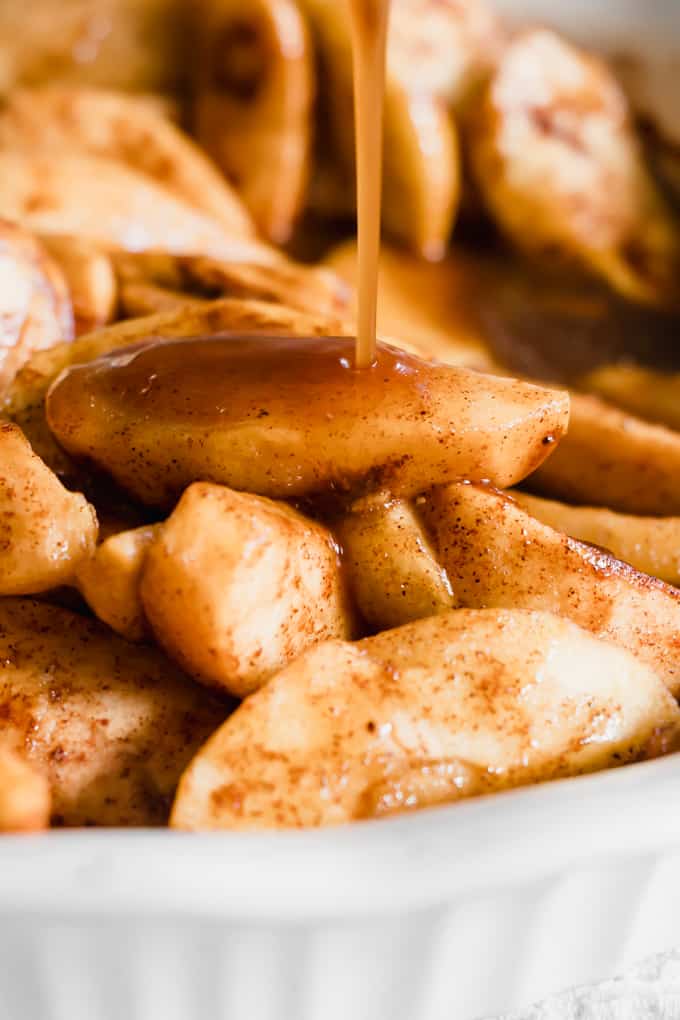
Easy Baked Apples

I haven't looked at my old applesauce recipe in a bit.  I spent 5 or more years eating no sugar of any kind, but that was not a sustainable way to eat for me.  These are fairly simple, very delicious and wonderful in either a bowl of oatmeal, or as the website I borrow it from suggests, warm over a scoop of vanilla ice cream.

Ingredients:
3 pounds of apples (a pound each Granny Smith, Honeycrisp and Gala work great)
1/2 cup light brown sugar
2 tsp. ground cinnamon
1/2 tsp. ground nutmeg
1/4 tsp. ground cloves
1/8 tsp. salt
1 tsp. cornstarch
lemon juice
1 tsp. vanilla extract
5 Tbsp butter


1) Preheat oven to 350 degrees

2) Peel the apples, cut and remove the core and slice about 1/3-1/2 inch thick

3) Add the apples to a large bowl or you can mix right in a pie dish or 2 quart baking dish.  Add the light brown sugar, cinnamon, nutmeg, cloves, salt, cornstarch, lemon juice and vanilla extract.  Stir to combine.   If using a bowl, spoon the apples into a pie dish or a 2 quart baking dish.

4) Cut the butter into small squares and place them over the top of the apples.

5) Bake for 30 minutes, stirring after the apples have baked for 15 minutes.  This prevents the apples on the top from drying.  Bake until the apples are tender and soft.

6) Remove and serve with a scoop of vanilla ice cream on top.  Serve warm

**Courtesy of houseofyumm.com


Joy's Easy Banana Bread

This banana bread lives up to the "Easy" in the title.  I do not like nuts, so that's a plus for me.
Smells and tastes delicious.

Ingredients
3 Ripe Bananas, Mashed
1 cup white sugar
1 egg
1/4 cup melted butter
1 1/2 cups all-purpose flour
1 tsp. baking soda

Preheat oven the 325 degrees.  Great a 9x5 inch loaf pan

Combine bananas, sugar, eggs and butter together in a bowl. Mix flour and baking soda in a seperate bowl.

Stir into banana mixture until batter is just mixed.  Stir in salt.

Pour batter into the prepared loaf pan.

Bake in the preheated oven until a toothpick inserted in the center of the bread comes out clean about 1 hour.

**Recipe courtesy of the Allrecipe website

Tuesday, October 20, 2015

10 Spice Vegetable Soup

I do not know how I happened upon the website www.ohsheglows.com but I am definitely going back, because this soup is soooo good!  Love, love, love it!

Ingredients:

For Soup:

  • 3/4 cup raw cashews, soaked
  • 6 cups vegetable broth, divided
  • 1 tablespoon extra-virgin olive oil
  • 3 large cloves garlic, minced
  • 1 sweet or yellow onion, diced
  • 3 medium carrots, peeled and chopped
  • 1 red bell pepper, chopped
  • 1 1/2 cups peeled and chopped sweet potato, regular potato, or butternut squash
  • 2 stalks celery, chopped
  • 1 (28-ounce/796-mL) can diced tomatoes, with their juices (or sub with fresh tomatoes - see blog post for my how-to)
  • 2 bay leaves
  • 1-1  1/2 tablespoons Homemade 10-Spice Blend (recipe follows), to taste
  • Fine-grain sea salt and freshly ground black pepper, to taste
  • 1 to 2 cups baby spinach or destemmed torn kale leaves
  • 1 (15-ounce) can chickpeas or other beans, drained and rinsed (kidney beans are fun too)

  • Homemade 10 Spice Blend (Makes 1/2 cup)
    • 2 tablespoons smoked paprika
    • 1 tablespoon garlic powder
    • 1 tablespoon dried oregano
    • 1 tablespoon onion powder
    • 1 tablespoon dried basil
    • 2 teaspoons dried thyme
    • 1 1/2 teaspoons freshly ground black pepper
    • 1 1/2 teaspoons fine grain sea salt
    • 1 teaspoon white pepper (optional)
    • 1 teaspoon cayenne pepper

      Directions:

      1.  Place cashews in a bowl and add enough water to cover. Soak the cashews overnight, or for at least 2 hours. Drain and rinse the cashews.
      2. In a blender, combine the soaked and drained cashews with 1 cup of vegetable broth and blend on the highest speed until smooth. Set aside.
      3. In a large pot, heat the oil over medium heat. Add the garlic and onion and sauté for 3 to 5 minutes, or until the onion is translucent. Season generously with Herbamare or sea salt.
      4. Add the carrots, bell pepper, potato, celery, and diced tomatoes with their juices, the remaining 5 cups broth, the cashew cream, and 1-1.5 tablespoons of 10-spice blend. Stir well to combine . Bring the mixture to a boil and then reduce the heat to medium-low. Season with salt and black pepper and add the bay leaves.
      5. Simmer the soup, uncovered, for at least 20 minutes, stirring occasionally, until the vegetables are tender. Season with salt and black pepper. During the last 5 minutes of cooking, stir in the spinach/kale and drained beans.
      6. To freeze, ladle the soup into containers (leaving 1-inch for expansion), cool slightly, secure lid and place in the freezer for up to 6 weeks.
      Tips: 1) If you don’t wish to make the 10-Spice Blend, feel free to use your favorite store-bought Cajun or Creole seasoning mix and add to taste. 
      2) You will have leftover spice blend. Store it in a container and keep it handy anytime you want to spice up a dish! It's great for pasta, soup, tofu seasoning, stir-fry, and more. 
    • 3) When thawed, this soup's broth looks a bit grainy, but rest assured when it's heated up again it will return to its former smoothness.
  • Saturday, July 25, 2015

    Ginger Garlic Salad Dressing

    Delicious, tangy, super easy to make and no added sugar which I LOVE!
    1 oz peeled ginger root,cut into chunks (weigh it after it's peeled)
    3 cloves garlic, smashed and coarsely chopped
    1 cup rice wing vinegar
    2 Tbsp. chopped onion
    2  Tbsp. water
    1/2 cup olive oil
    2 tsp. sesame oil
    4 Tbsp. tomato paste
    4 Tbsp. soy sauce

    Combine all ingredients, including a pinch or two of salt, in blender and process until fairly smooth

    **Adapted from recipe on Food.com


    Friday, July 17, 2015

    Homemade Ginger Dressing

    If tangy is your game, this is for you!  This is a variation on a recipe for dressing for the commercial brand Makoto Ginger Dressing.


    1 oz peeled ginger root, cut into large chunks
    2 large cloves of garlic, smashed but not chopped
    1 cup rice wine vinegar
    2 Tbsp. chopped onion
    2 Tbsp. water
    1/2 cup olive oil
    3 tsp. sesame oil
    4 Tbsp. soy sauce
    1 six oz.can Tomato paste
    pinch of salt and more to taste

    Combine ingredients in blender and process until fairly smooth.  Add more salt if needed.

    Store in refrigerator.

    Adapted from Food.com recipe

    Tuesday, December 30, 2014

    Veggie Lasagna

    Not vegan but for the dairy consuming vegetarian, go to town!  :)  This is a great dish to give someone, unbaked, because they can pop it in the freezer and then thaw it out and bake it at their own leisure.


    Ingredients:
    Oven baked vegetables (see previous recipe)
    5 cups favorite pasta sauce
    1 cup water
    15 oz. part skim ricotta cheese
    1 egg, beaten
    1/4 cup Parmesan cheese, plus more for later use
    salt and pepper
    dried basil and/or oregano
    1 box no boil lasagna (DeBoles gluten free is good)
    8 oz. bag shredded mozzarella cheese

    Mix sauce and water together in a bowl.
    Mix eggs, ricotta cheese, salt, pepper and 1/4 cup Parmesan in a separate bowl.
    Have cooked veggies ready.

    For using a 9x13 baking dish/pan:
    Pour 1/2 cup sauce on the bottom of pan.
    Line pan with lasagna noodles
    Put 1/3 of the cheese mixture on top and spread along noodles (NOTE!! NOT 1/3 CUP BUT 1/3 OF THE ENTIRE PORTION.  SAME BELOW)
    Put 1/3 of the veggies on top
    Cover with 1/3 of the sauce
    Cover sauce with 1/3 of the mozzarella cheese
    Add a few shakes of Parmesan and a few shakes of dried basil and/or oregano.
    Repeat layers twice.
    Bake, covered, at 350, for 45 minutes and then uncover and bake until middle is hot and cheese is bubbling.
    If you have refrigerated or frozen and then thawed the lasagna, it may take a bit longer.
    Once it is ready to take out of the oven, give yourself enough time to let it set for 10 minutes and settle before serving.
    If you want to freeze or refrigerate to serve later, don't bake it first! 

    I have found this is a recipe that benefits from having time to experiment with pan sizes.

    If  you find your pan is too shallow, it will be just as good with 2 layers instead of three.  I've read that some people look for pans that are 13x9 but deeper than the standard 2 inches.

    For those who have the time and patience and don't want a huge, 13x9 pan of lasagna,  I recently began buying disposable aluminum poultry pans, with dimensions of  9 3/8 x 9 3/8 x 2 3/8 and dividing everything above into two pans.  The middle layers of cheese and sauce and veggies may need to be reduced a bit to give you enough ingredients to make two smaller lasagnas or you can anticipate that ahead of time and buy extra of everything.

    In the end, lasagna is something that ends up all mushed up on people's plates so I find the aesthetics are secondary, so long as it's yummy!  :)

    **For the carnivores: You can replace the veggie layers with cooked Italian sausage.
    **Leave out the veggies and its a great cheese lasagna


    Oven cooked veggies

    When I make these, I cook them in a baking dish, which results in a moister texture.  If you are looking for a drier consistency, then I suggest spreading them on a cookie sheet before baking.


    In a large bowl. combine the following vegetables in a large Tupperware bowl with a lid (all veggies cut into large chunks) :

    1 1/2 cups onion
    1 1/2 cups peppers NOT GREEN - but that's just me :)
    1 1/2 cups mushrooms
    1 1/2 cups zucchini
    1 1/2 cups yellow squash

    Combine all veggies in a Tupperware bowl with 1/4 cup olive oil and 1 Tbsp. fresh, chopped rosemary.

    Put lid on bowl and shake until well coated.

    Bake at 400 degrees for 35 minutes, stirring occasionally.  Taste 1 piece and determine if it is the desired consistency.  If not, continue to bake, checking every 7 minutes until satisfied with consistency.
    Makes roughly 4 cups veggies.

    Optional: Include 1 1/2 cups eggplant.

    Friday, December 26, 2014

    Oatmeal - Redux Part 3

    Yes, yes the oatmeal continues to evolve.  It was pointed out to me a few months ago, that a banana is sweet enough to really hold its own as the only fruit in this.  I also substituted the almond milk with soy milk, to increase the fat content slightly.  Simpler, in my opinion, usually equals better!


    1/3 cup quick, 1 minute oats
    2/3 cup unsweetened soy milk
    1 banana (the riper the better)
    Dash of cinnamon

    Mash the banana and combine with other ingredients in a deep bowl.  Microwave for 1 minute, stir.  Microwave for another 30 seconds.  Stir again and serve.
    Times on the 2nd microwave go-round may vary, depending on your microwave.

    Thursday, December 25, 2014

    Sugar Free Vegan Banana Milk Shake

    Simple and delicious!!
    The ingredients are:
    8 oz. unsweetened soy milk
    1 banana, the riper the better

    There are two different ways to prepare.

    For a frothier shake, combine the soy milk and banana in a blender, along with 4-6 ice cubes until combined.

    For a thicker shake, freeze the banana for an hour or more and combine in blender with soy milk but don't add ice cubes.

    Either way, really great and no added sugar of any kind.

    Wednesday, December 24, 2014

    Israeli Salad with Pickles and Mint

    I first had this in a Mediterranean restaurant in NY City and fell in love with it.  This is the first thing in my life that has made me want to buy/cook with/consume pickles!   Another recipe that may take some experimenting to find what your taste preferences are, as far as how much of each flavor you want to come through.  I found, with the measurements below, the flavors blended nicely.

    • 1 lbs. Persian or English cucumbers, (the ones I bought didn't say Persian or English, they were just the mini cucumbers with fairly soft peels, so I didn't peel) diced
    • 1 lbs. ripe tomatoes, seeded and diced
    • 3 large dill pickle spears, diced  (maybe 3/4-1 cup after diced)
    • 15 fresh mint leaves, chopped 
    • 2 Tbsp extra virgin olive oil
    • 2 Tbsp.  fresh lemon juice (or more to taste)
    • 1/2 tsp salt (or more to taste)
    Combine cucumbers, tomatoes, dill pickles and mint in a bowl.  Add olive oil, lemon juice and salt.  Toss to coat.  
    Taste the salad.  Add additional salt and/or lemon juice to taste if deired.  Toss again before serving.
    Can be served on a bed of spring greens.  Goes well with hummus also. 


    Smooth and Easy Hummus

    I am having a blast learning to cook Mediterranean dishes.  So many great vegan options to explore!  This is a great recipe that even my carnivores enjoy!  The key is patience.  It doesn't take an enormous amount of time, but everything is processed for a longer period of time after each addition.  I serve it with veggies, since I don't eat bread or pitas and doubling this recipe it is the easiest thing in the world!

    One 15-ounce can chickpeas/garbanzo beans
    1/4 cup fresh lemon juice (about 1 large lemon)
    1/4 cup tahini
    Half a large garlic clove, minced
    2 Tbsp. olive oil, plus more for serving if desired
    1/2 tsp to 1 tsp. kosher salt, depending on taste
    1/2 tsp. ground cumin
    2-3 Tbsp. water
    Dash of ground paprika for serving (optional)

    In the bowl of a food processor, combine tahini and lemon juice.  Process for 1 minute.  Scrape sides and bottom of bowl then turn on and process 30-60 more seconds.  This extra time helps "whip" or "cream" the tahini, making smooth and creamy hummus possible.

    Add the olive oil, minced garlic, cumin and salt to the whipped tahini and lemon juice mixture.  Process for 30 seconds, scrape sides and bottom of bowl then process another 30 seconds.

    Open can of chickpeas, drain liquid then rinse well with water.  Add half of the chickpeas to the processor and process for 1 minute.   Scrape sides and bottom of the bowl, add remaining chickpeas and process 1-2 minutes until thick and quite smooth.

    This is where tasting the hummus and making a determination of your own preferences comes into play.  If you feel the hummus could be smoother, add water, 1 Tbsp. at a time, processing after each addition, until you get to the consistency you wish.  You may also add a little more salt if you feel it needs it.

    It can be served warm or chilled.  It can be served with pita bread or fresh vegetables.  It can be served with 1 Tbsp. olive oil drizzled on top and some paprika sprinkled on that, or served without.  Hummus is the ultimate in versatile food!

    Recipe adapted from www.inspiredtaste.net


    Roasted Garlic

    Love, love, love this!  Use it in different dishes or occasionally just pop one in my mouth! :)
    1 or more heads of garlic
    Olive oil
    Knife
    Aluminum foil

    1) Heat oven to 400 degrees.
    2) Peel (most of) the paper off garlic.  Use your fingers to feel away all the loose, papery, outer layers around the head of garlic.  Leave the head itself intact with all the cloves connected.
    3) Trim about 1/4 inch off the top of the head of garlic to expose the tops of the garlic clove.  (The hard, round section is the bottom of the garlic head)
    4) Drizzle 1 to 2 tsp. olive oil over the exposed surface of the garlic, letting the oil sink down in the cloves.
    5) Wrap each garlic head in its own aluminum foil.  I make sure it's closed but not very tight around the garlic.
    6) Roast in the oven for 40 minutes.
    7) After 40 minutes, begin checking the garlic.  You can pierce the center clove and feel if it's soft, although typically if the garlic appears light-medium brown and roasted, it's done.  If you continue to roast, check every 10 minutes after.
    8) Let the garlic cool slightly.  Press on the bottom of the clove to push it out of the paper or, if it's cool enough, peel the paper off.
    If part of any clove is hard and too roasted, I remove that with a knife.  The roasted garlic can be refrigerated for up to 2 weeks.  If you cover the roasted garlic with olive oil before refrigerating then you get olive oil with a nice garlic flavor and use that in cooking as well.

    I adapted the directions from www.thekitchn.com for this post, just to save time, but what they have lines up exactly with how I roast garlic.

    Wednesday, December 17, 2014

    Brown Rice Update

    An update to the Beans and Rice recipe, I recently came upon Trader Joe’s Rice Blend.  It has high fiber content and with barley and Daikon Radish seeds, is much healthier than your standard, instant brown rice.  I fix the rice blend according to the package directions and then when it’s done, I add about 1 3/4-2 cups to the bean and chorizo mixture that’s already cooking.  Tastes even better!